Ever think about the potential setup and installation processes that you’re going to have to go through and said to yourself it’s not for me and it’s probably too much work anyway!
Well, it’s time to dismiss that thought and start thinking about what’s right for the environment and reduce your utility expenses while you’re at it. There are a vast of other reasons why you need to start using solar panels and don’t worry because we are here to guide you throughout the process and answer any questions you may have.
Here is the solar panel installation process:
Step 1:
The first thing that you got to do is to find a reliable solar panel installer or should we say partner in this whole deal. You need to make sure that you check the credentials of the people that you are going to be working with and make sure that they are SEAI certified, reliable, and most of all they’ve got the passion like you to help conserve energy and help lower your utility bills.
Trust is important in this process and if that is established everything from here on out should be smooth sailing.
Step 2:
Now that you’ve found your partner in getting your solar panels installed; it’s time to set up that consultation and get a site visit. There’s really no one size fits all approach here even though you might think otherwise because all solar panels look the same.
As solar panel providers, we need to make sure that we visit your place and tailor-fit our procedures to your property, here we will take note of all of your unique needs. Not all setups are the same and we want you to get the best possible scenario for your solar panel needs. Your current electricity consumption and your budget should also be noted down in this part of the process so that we are also always on top of your spending.
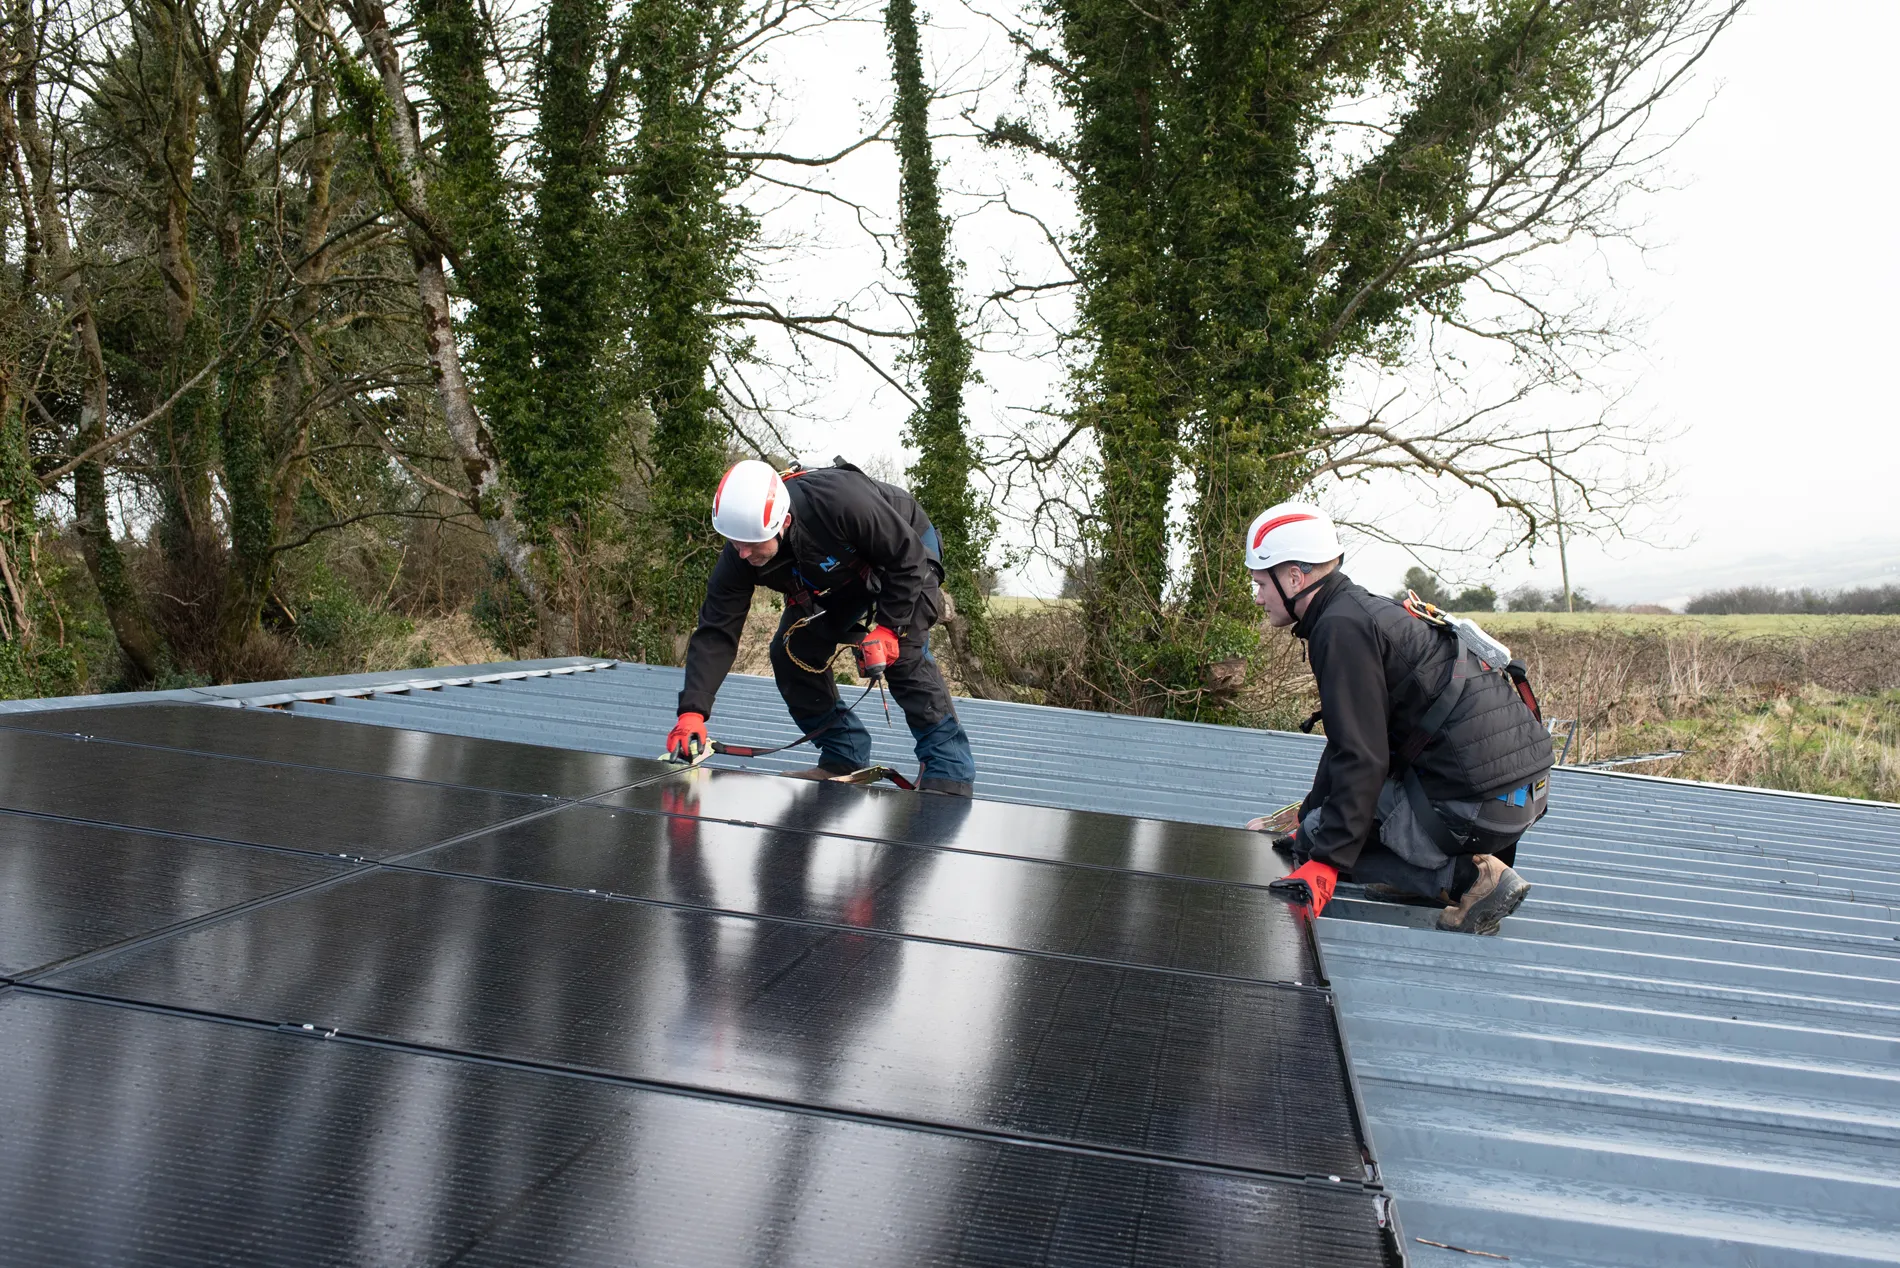
Step 3:
Once all the paperwork has been settled and all technical considerations are in place, it’s time to get your solar panels installed.
Once we get to the installation the very first consideration is to ensure that the panels are in the most strategic place that they get maximum sunlight all year round and ideally at an angle of 30 to 45 degrees.
Step 4:
Once all the panels that are about to be installed have their places then it’s time to ensure the installer’s safety as they work. Don’t be surprised if they are going to install temporary scaffolding as they work. We always put a premium on everyone’s safety for the quality of work would also depend on that in return.
Then once our installers are safe and secure, we make sure to build the mounting systems for the solar panels. Once again, maximum sunlight exposure is the goal, trying to avoid shading and potential obstructions like large trees and chimneys.
Step 5:
Next is the wiring process and yes, we are almost done. One thing needs to be ensured in this part of the process, your household’s electric supply should be turned off completely this is only for a short time and should not interrupt your daily routine too much.
Step 6:
Now it’s time to get you familiarised with the solar inverter. The solar inverter is responsible for a lot of useful functions you’d expect from your Solar PV system.
It should be attached to solar panel array and can either be outdoors or indoors. The attic, garage and utility areas are usually the best places to install them in or any area that is well-ventilated. If installed outdoors then it should at least be not as exposed to the hot afternoon sun.
The inverter is then connected and this generates electricity. There will also be a generation app installed so you can monitor the electricity generated at all times. This ability to monitor your usage will help you organize or delegate the available solar energy for your household needs.
Step 7:
Not all installations will opt for this step but depending on the system that your consultant designs for you, you may opt for a hot water diverter or a battery storage system.
The hot water diverter is very useful for people who are at home a lot and are currently using oil/gas to heat their water, this add-on can help reduce your dependency on fossil fuels.
So, how does it work? Well, basically once the solar PV system has satisfied you electricity needs and there is some surplus energy being produced, the excess will be diverted to heat your water, the hot water diverter can reduce your hot water bills by up to 70% and is generally at its peak from March to September.
And what about the battery? Well, this is more suited to someone who has a larger system or who are out of the home during the day, this works under same principle as the hot water diverter in that once your electricity needs have been satisfied, the excess is sent to charge the battery. This energy can then be used later in the evening when the solar panels are not producing.
Step 8:
Time to get it all tested! Your installation process is complete and right now, all you have to do is to try everything out and see if it’s all working. Pretty straightforward, yes? Well, it should be, it’s not a very complicated process in the first place.
Contact the North Cork Electrical team today to start your installation process.